Quick Start guide
SCAD Re-Event has lots of special features for Stage Design, but is also a fully functional generic CAD system. In this quick start tutorial we will focus on the features dedicated to drawing events. There is a manual with a list of all commands and features, please read that manual if you need information not found here.
Intro
The main part of REV is the library, many commands relate to the library or handling block, the items you get when inserting parts into the drawing. When drawing Events you will mainly use pre-drawn blocks from the library, you do not have to model 3D objects yourself (although this is possible, all objects in the library are created with REV). So finding, placing and editing blocks is a very important part of REV and therefore many commands are available to work with blocks. The first part of this manual is all about manipulating blocks.
In the second part we will focus on the special commands, like creating Line Array, Coordinate Lists, Scaffolding etc.
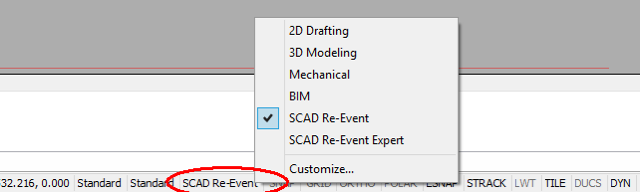
This manual has screenshots of the SCAD Re-Event Workspace (ribbon). Pleas switch to this workspace by typing the command WSCURRENT and enter “SCAD Re-Event”, or rightclick on the workspace name in the bottom of the screen:
The Library
Inserting Blocks
- Align (ctrl button). When pressing and holding the ctrl button you can rotate block dynamically. The rotating starts when pressing the ctrl and stops when releasing the ctrl button. Combine this with entity snaps to align the block exactly with existing items in the drawing before actual inserting it.
- Left (L <enter>). Rotates the block 45 degrees counter clock wise.
- Right (F9 or R <enter>). Rotates 45 degrees clock wise.
- Angle (A <enter>). Asks for the rotation angle.
- 0 (0 <enter>). Resets the rotation.
- Angle Dif (D <enter>). Asks for two angles and rotate the block the difference between these angles. This is mostly used with the move and copy commands, when the block is rotated already before moving or copying.
- X (X <enter>). Rotates the block 90 degrees about its original X-axis.
- Y (Y <enter>)>. Rotates the block 90 degrees about its original Y-axis.
Update from library
The command UPDATEFROMLIB updates all blocks in the drawing with the block in the library
Edit Objects
Selecting objects
Select by block (SELBLK) asks to pick a single block and will select all instances of that block in the drawing.
If you find similar blocks do not have the same name but are numbered (happens often when importing from other programs), the use Similar Block Name (SELSIMBLKS). Pick two blocks which start with the same string (i.E. “vl1000-12” and “vl1000-34”) and SCAD Re-Event will select all blocks that have the same beginning characters (in the example “vl1000-”).
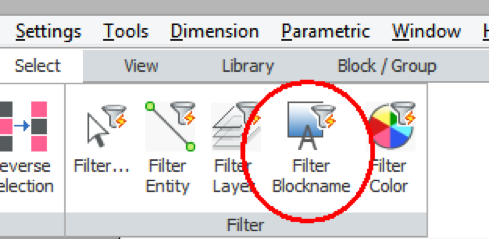
There are some filters which filters out colors, layers, blocknames and entity type. These filters allow you to select only the object you want when using a windows selection. To find a certain block in a window:
Filter Blockname (SFB), select a block, select a window.
A very powerful command to find blocks, even when they are nested is SCFINDBLOCK, it will highlight all instances of the block you select.

Move and Copy objects
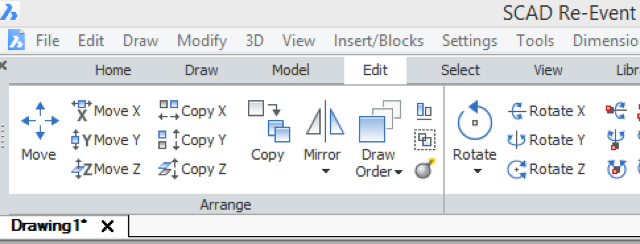
Normally you first select the objects you want to move. Start with move with the M2 command (not MOVE) or click in the ribbon on MOVE:
SCAD Re-Event asks for a reference point. When you have selected a single objects, like a block, ENTER will use the default reference point of the object. If you have selected multiple objects, the default reference point is on the left-bottom of the selection.
During the move command, you have the same options as with inserting objects from the library (see above).
Special Move commands
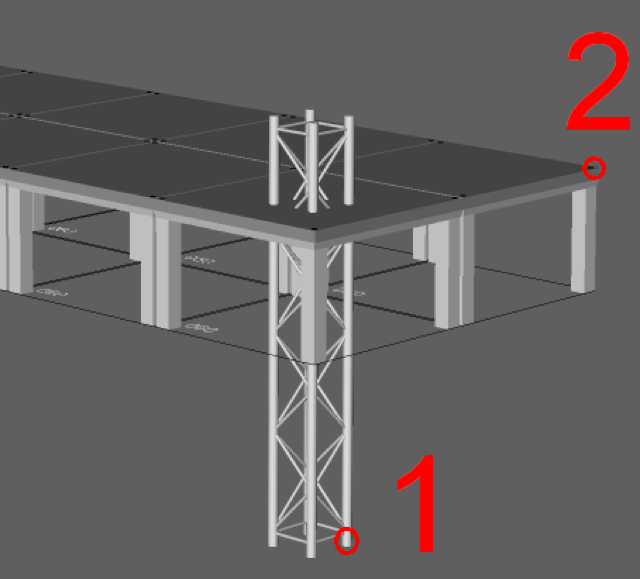
MX,MY,MZ: moves the objects in X, Y or Z direction. You can enter a distance by clicking in the drawing or by entering a number. The number can be ending with “m”, “cm” or “mm”, which will convert the unit accordingly. This only works correctly when the current units is Meter or Millimeter (Enter UNITS to check).
If you want to move object to a certain Z height, just click on the point you want to be on the new height and then on the height itself.
Example: Moving a truss to the stage height (MZ):
Rotate objects
Objects can be rotated when moving or copying them. But there are some special rotate commands to rotate objects, most of them are developed to rotate blocks because it will use the reference point of the block.
RX/RY/RZ
A normal rotate command which will rotate objects around the X, Y, or Z axis. All objects are rotated about the same point.
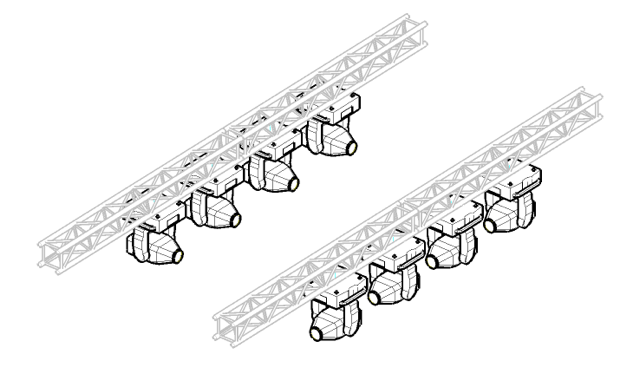
RXB/RYB/RZB
All objects are rotated about the X, Y, or Z axis, but every item uses its own reference point. RZB on the fixtures:
RXBI/RYBI/RZBI
Rotates around X, Y, or Z axis, but uses the local axis of the block.
RBCLEAN
When a block is rotated about the Z-axis, you can find and change the rotation in the properties bar. But when it is rotated about X and/or Y-axis the angle(s) are not visible. You can reset the rotation by using RBCLEAN. The block will reset all angles to the original position.
CB/RB Copy Block / Rename Block
With RB you can change the name of a block. You can also change the name in the Drawing Explorer. With CB you create a new block with a new name. The new block is an exact copy of the original. Use this if you want to change one block, without changing all other instances.
CBI/ CBIR Change Block Insertion
With CBI you change the Insertion Point of a block. The position of the block remains the same, but the contents will move. CBIR changes the insertion point of a block and moves it to a new position in a way that the contents of the block stays in the same position. Please notice when you change the Insertion Point of a block all blocks will have this new Insertion Point.
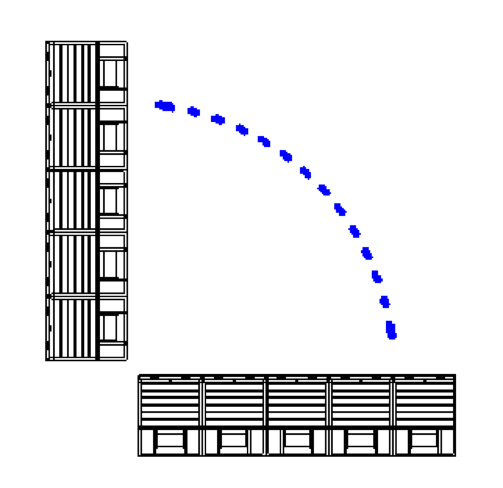
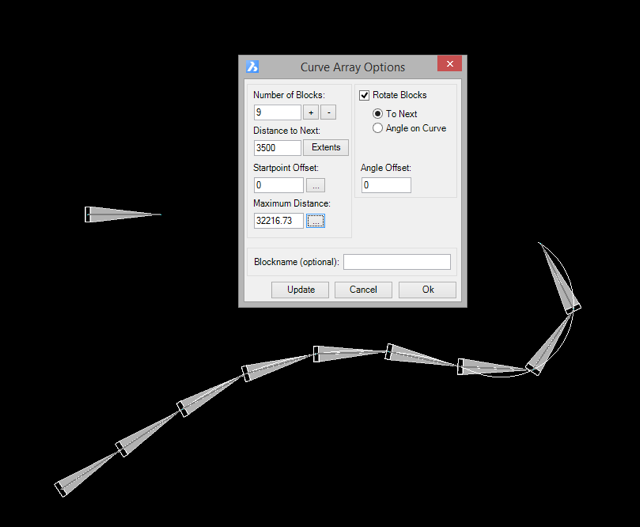
Curvearray
This command was originally created for fencing, but you can use it in many situations.
When changing the contents of the menu you can hit TAB or click Update to see the effect of the changes in the drawing. This is a modeless menu that allows you to zoom and pan while the menu is visible.
Number of blocks: Is calculated automatically by dividing the length of the path by the length (X extends) of the block. If you change this the 'Distance to Next' will change too, choose one of the two to set.
Distance to next: Enter a distance or click 'Extends' to calculate the amount of blocks that will fit on the path.
Startpoint offset: Enter a number or click somewhere on the path to skip a distance on the path.
Maximum distance: Stop at this distance on the path.
Rotate Blocks: When 'To Next' is selected the block will rotate on an arc in the path curve in a way that is tries to connect with the next block. With 'Angle on Curve' the block will use the angle of the curve at the point where it is inserted.
Blocks
Block Editor
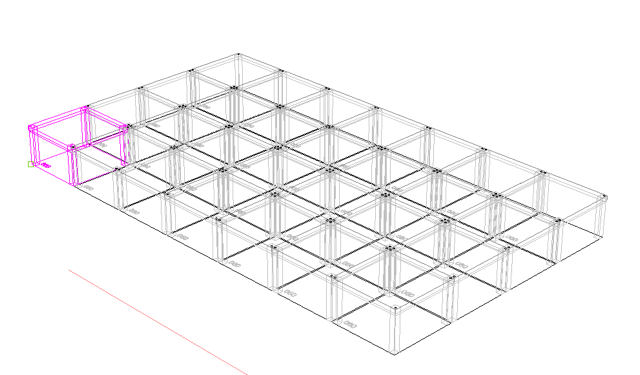
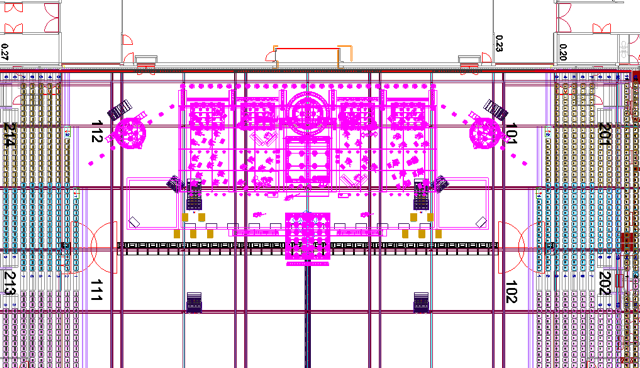
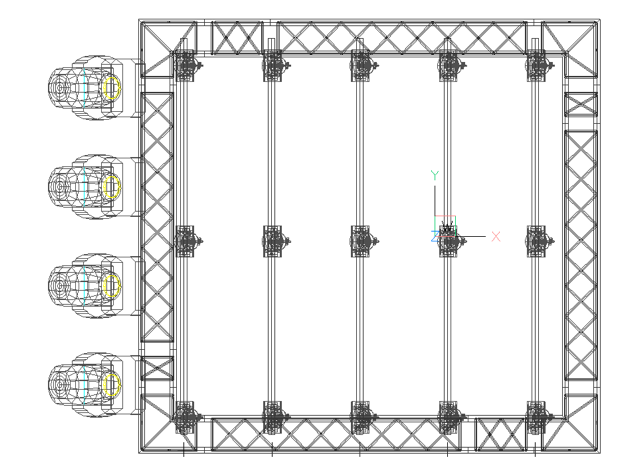
An easy way to organize a complex drawing is by creating blocks of parts of the drawing. In the blocks you can have sub blocks, and so on. An example:
You see one block highlighted (STAGE):
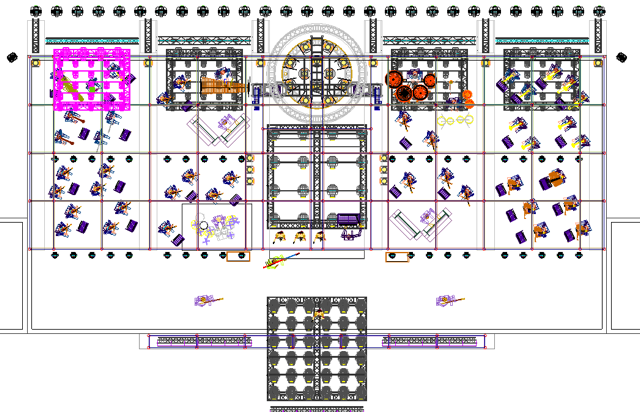
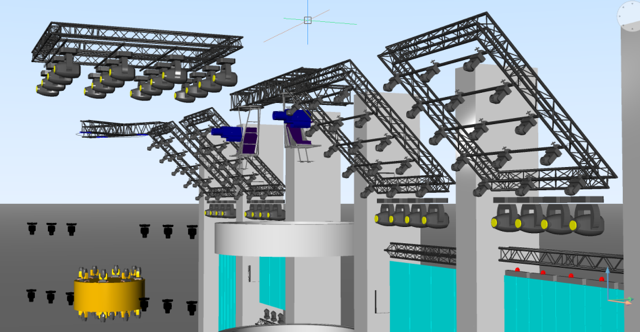
The stage can now easily been edited without having the building visible by entering this block (SCBEDIT)
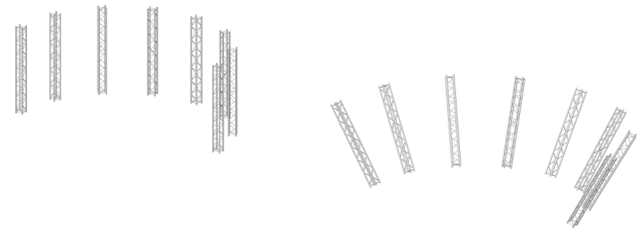
In the STAGE block we go one deeper by editing the truss combination (which is rotated around Y axis):
Now we are in this part to edit:
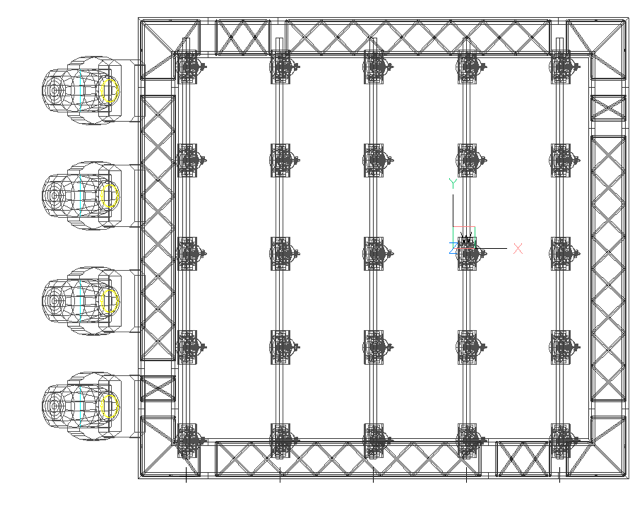
As you see the objects are now placed horizontally instead of rotated as in the stage itself, so it is much easier to edit.
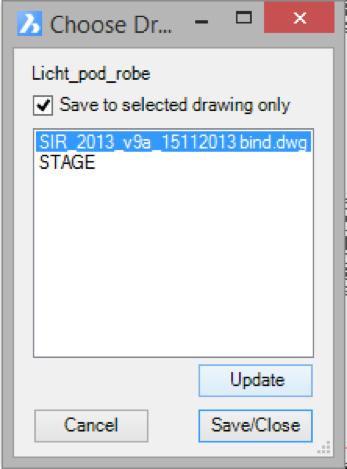
Save the changes with BESAVE (or just update them to the main drawing to see the changes in the main drawing without leaving the block editor, UNDO possible!)
Fixtures removed (as example):
BESAVE and Update (Or Save when you are done with block editing):
Switch to main drawing (drawing tabs on top) to see the update:
Working in a complex drawing can make editing slow and cumbersome. To help you with this you can use blocks and edit them (as shown above), but there are more options like Hiding objects and switching to a simplistic version of the drawing.
Replace Blocks
When a blocks needs to be replaced you can use the REPLACE command. Sometimes you probably want to replace all instances of a block, use SELBLK or other filters/select command to select the blocks. You can replace different blocks with one block, all blocks you select to replace will be replaced with the replacing block.
Finding Blocks
If you need to know where a certain block is used you can either select it in the Block Info menu in SCADLIB while the Highlight switch is on or just enter the command SCFINDBLOCK.
Legend
With the LEGEND command a Legend from the selected block is placed in the drawing. You can specify the size and the description is taken from the database.
Counting objects and values
There are two ways to calculate objects: a fast way meant for checks during design creation and a bill of materials meant for export.
Fast check
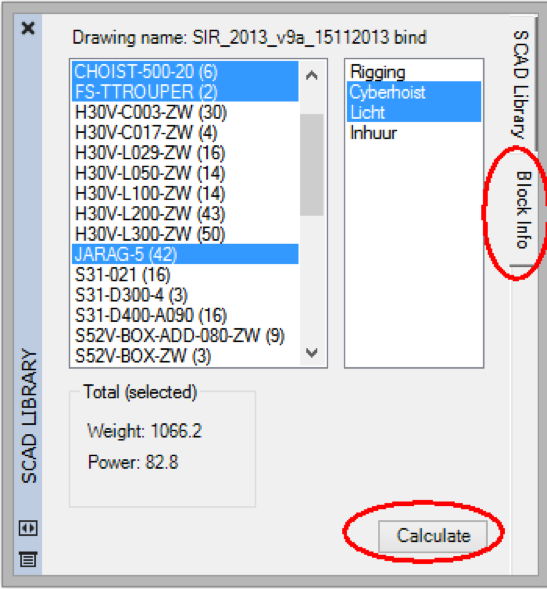
Select multiple objects and click on Calculate in the after selecting the Block Info tab in SCADLIB.
You can select individual or multiple blocks to see totals, but also a category (or multiple) on the right. Please notice you can have nested blocks, SCAD Re-Event will find the correct amount anyway.
Bill of materials
The command POSTCALC gives a total of the whole drawing or a selection. You can select the fields which need to be exported by dragging them to the right or left:
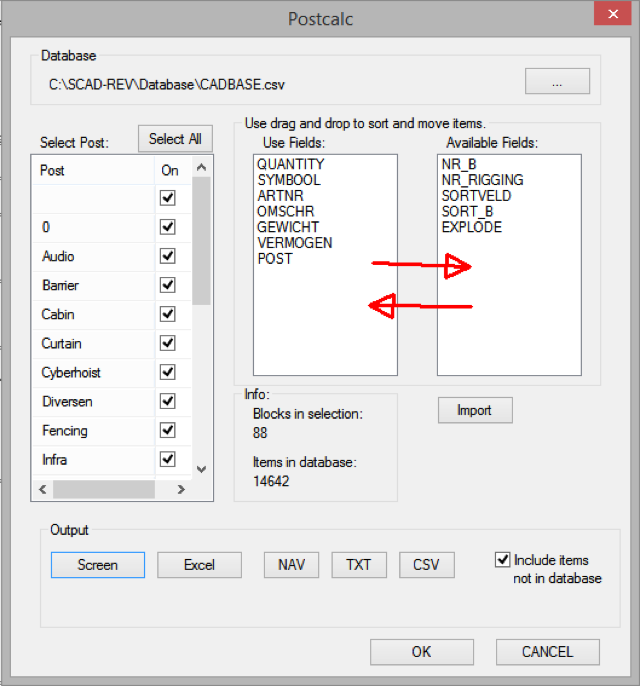
The fieldnames are defined in the database, you can use any name you like, but the if you want to have the power and weight totals name these fields POWER and WEIGHT (or in dutch VERMOGEN en GEWICHT).
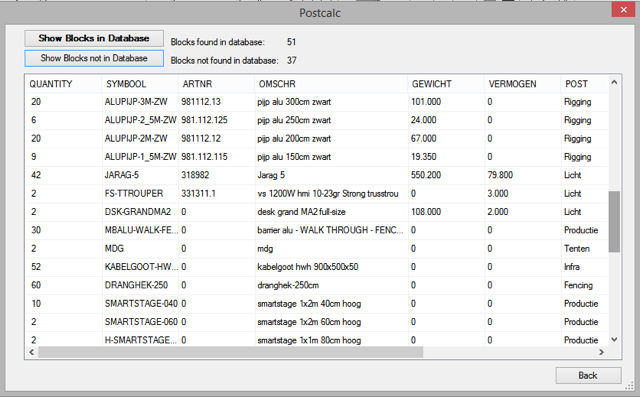
Click on SCREEN to preview the results:
Please notice you only see blocks in this screen that are found in the database (that is: the blockname is found in the database file). If there are blocks found in the drawing, but not in the database, you will see them by pressing the “Show Blocks not in Database” button.
Miscellaneous
Using the Tree View
Blocks can be edited in the Tree View, open this with SCBLOCKTREE. The selected blocks are displayed in the menu (or all blocks, when nothing was selected). You can move subblocks to other blocks by dragging them with the left mouse button, or copy them with the right button.
Note: This is a very powerful command, please try to understand what happens before using it.
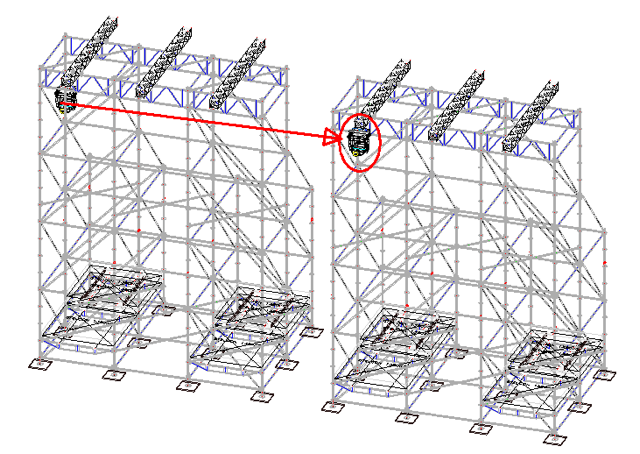
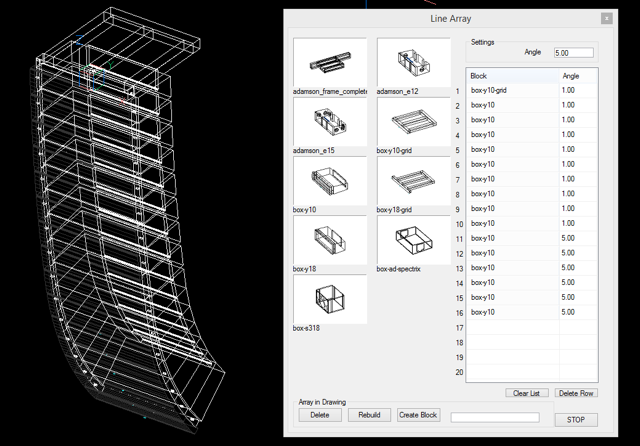
Line Array
When inserting blocks with SCADLIB you will see the LA button in the lower left of the iconmenu when the pagename starts with “LA”.
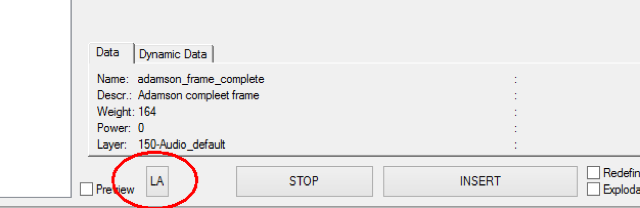
When clicking this button the Line Array menu pops up.
Click on the block to add it to the array. You can change angles as long the menu is visible. When you enter a name in the field below and click Create Block the resulting array will be a block. The array is created on 0,0 in the drawing, you can zoom and pan while the menu is visible.
Hiding objects
You can Hide objects or Isolate them. If you choose Isolate, you can Isolate again to refine the objects visible. If you used multiple steps to isolate the objects you want, you can go back by unhiding all objects (Show All), but you can also go one step back (Show PSCAD Re-Eventious) and isolate again if you want.
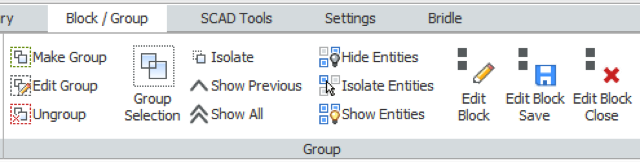
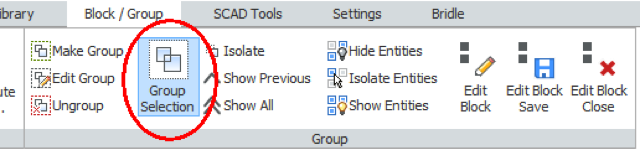
Groups
Sometimes it is easy to have a certain selection saved. If you have created a group, please notice you will select the whole group when Group Selection is pressed:
Textgenerator
The textgenerator creates text like 1A 1B 1C 2A 2B 2C 3A etc. If you select Fix the number (or character) will not increase.

Scaffolding
Useful commands for Scaffolding are:
• CX/CY/CZ
• Rotate during move/copy (F9)
• X2072, X-2072, Y2072, Y-2072
• STPLAN
• Sections commands
• SHOWDUPBLK (selects all duplicates)
• POSTCALC (BOM)
• SCFINDBLOCK
Some Keyboard shortcuts
Ctrl A: Select all object, but not the invisible objects
Pgup: Plan view
Pgdn: Isometric view
F1: Nearest snap
F2: Endpoint snap
F3: Snap on/off
F4: intersection snap
F5: toggle Z=0 on/off (osnapz)
F9: Rotate object when move/copy/insert